Hi everyone! Today I'm reviewing Milani's Top Toe Pink Color for Nails!
Color wise, I am in LOVE. It's a sweet pink with a little neon touch, the perfect mix of causal and "Eye-Popping." I'd wear it every time I do my nails, but I enjoy experimenting so I don't think that would be a possibility.
But, then, there comes that one down-fall. It takes FOREVER to dry. I waited 25 minutes and it was still a bit sticky. They could improve their Drying rate, so for those Freeze/Insta dry Lovers, your out of luck.
On another plus size, it has that shiny 'Wet look' to it that catches the eye of anyone. Enhance even MORE by adding just a touch of Top Coat. It's pretty cool.
Overall, I give this product a Thumbs Up! I will be reviewing the Gold Glitter I put on it in my next post. Till then, See ya!
bird
Thursday, July 11, 2013
Bento "Side-dishes"!
Friday, July 5, 2013
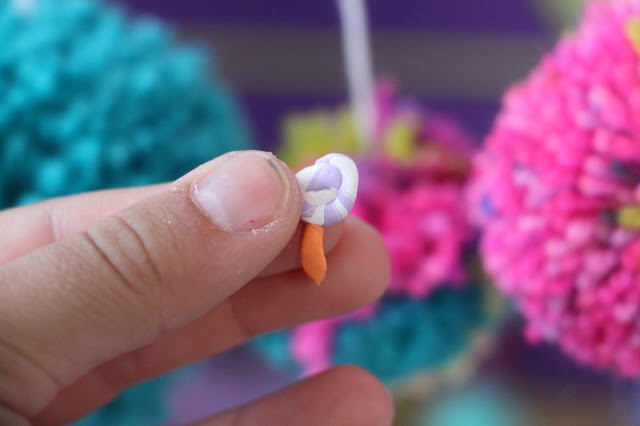
How to make Lollipop Polymer Clay Charms!
I will be selling these, and other charms! I am working on setting up my shop. Check MarshmallowPandaPuffs regularly for more information.
2. Roll a ball out of the both Lavender and White clay.
3. Now that you have the balls, take one finger and roll out both balls. Progress how many fingers according to how long the strings are getting. It should be as thick as a small tree branch. Now, line them up next to each other.
4. Now, take the ends of the strings and twirl them, so it looks as if stripes.
6. Roll up the segment into a snake shape, and when the 'snake head' is hissing, push it down to look like a lollipop.
7. Now, we are going to back away from the Lollipop. Now, we wil do the stick. Take some orange and just a tad of white.
8. Mix it thoroughly, with a few touches of other colors. (Optional)
9. Divide the ball, Re-rolling out the individual balls you made.
10. We are doing the same thing we did as Step 4 and 5.
Now, we have both of our Lollipop segments.
11. Now, we will refine the last touches of the lollipop. Flatten it, push the snake head so it is blended in the Lollipop, and, finally, take a pointy end and increase the dramatic effect of the inside of the lollipop, making it distinctively look rolled up.
12. Attach the too Lollipop segments.
With the excess, feel free to make mini-sized lollipops for little toys, such as Mini-Lalaloopsies, Littlest Pet Shop, and everything else.
Hi! Today I am showing you how to make an ADORABLE Lollipop Clay Charms. Let's get started!
What You need
~ ~ ~ ~
1. These polymer clay colors:
White, Lavender, Orange.
2. A tool to shape clay (optional)
Steps
~ ~ ~ ~ ~ ~ ~ ~
1. Pick out your White and Lavender clay, and cut off a corner of each.
2. Roll a ball out of the both Lavender and White clay.
3. Now that you have the balls, take one finger and roll out both balls. Progress how many fingers according to how long the strings are getting. It should be as thick as a small tree branch. Now, line them up next to each other.
4. Now, take the ends of the strings and twirl them, so it looks as if stripes.
5. Roll the stripes so it is flat, and the surface ISN'T bumpy, but smooth. The texture should also look more refined.
6. Roll up the segment into a snake shape, and when the 'snake head' is hissing, push it down to look like a lollipop.
7. Now, we are going to back away from the Lollipop. Now, we wil do the stick. Take some orange and just a tad of white.
8. Mix it thoroughly, with a few touches of other colors. (Optional)
9. Divide the ball, Re-rolling out the individual balls you made.
10. We are doing the same thing we did as Step 4 and 5.
Now, we have both of our Lollipop segments.
11. Now, we will refine the last touches of the lollipop. Flatten it, push the snake head so it is blended in the Lollipop, and, finally, take a pointy end and increase the dramatic effect of the inside of the lollipop, making it distinctively look rolled up.
12. Attach the too Lollipop segments.
With the excess, feel free to make mini-sized lollipops for little toys, such as Mini-Lalaloopsies, Littlest Pet Shop, and everything else.
Subscribe to:
Comments (Atom)


